

KAFLEX multi
Installation steps
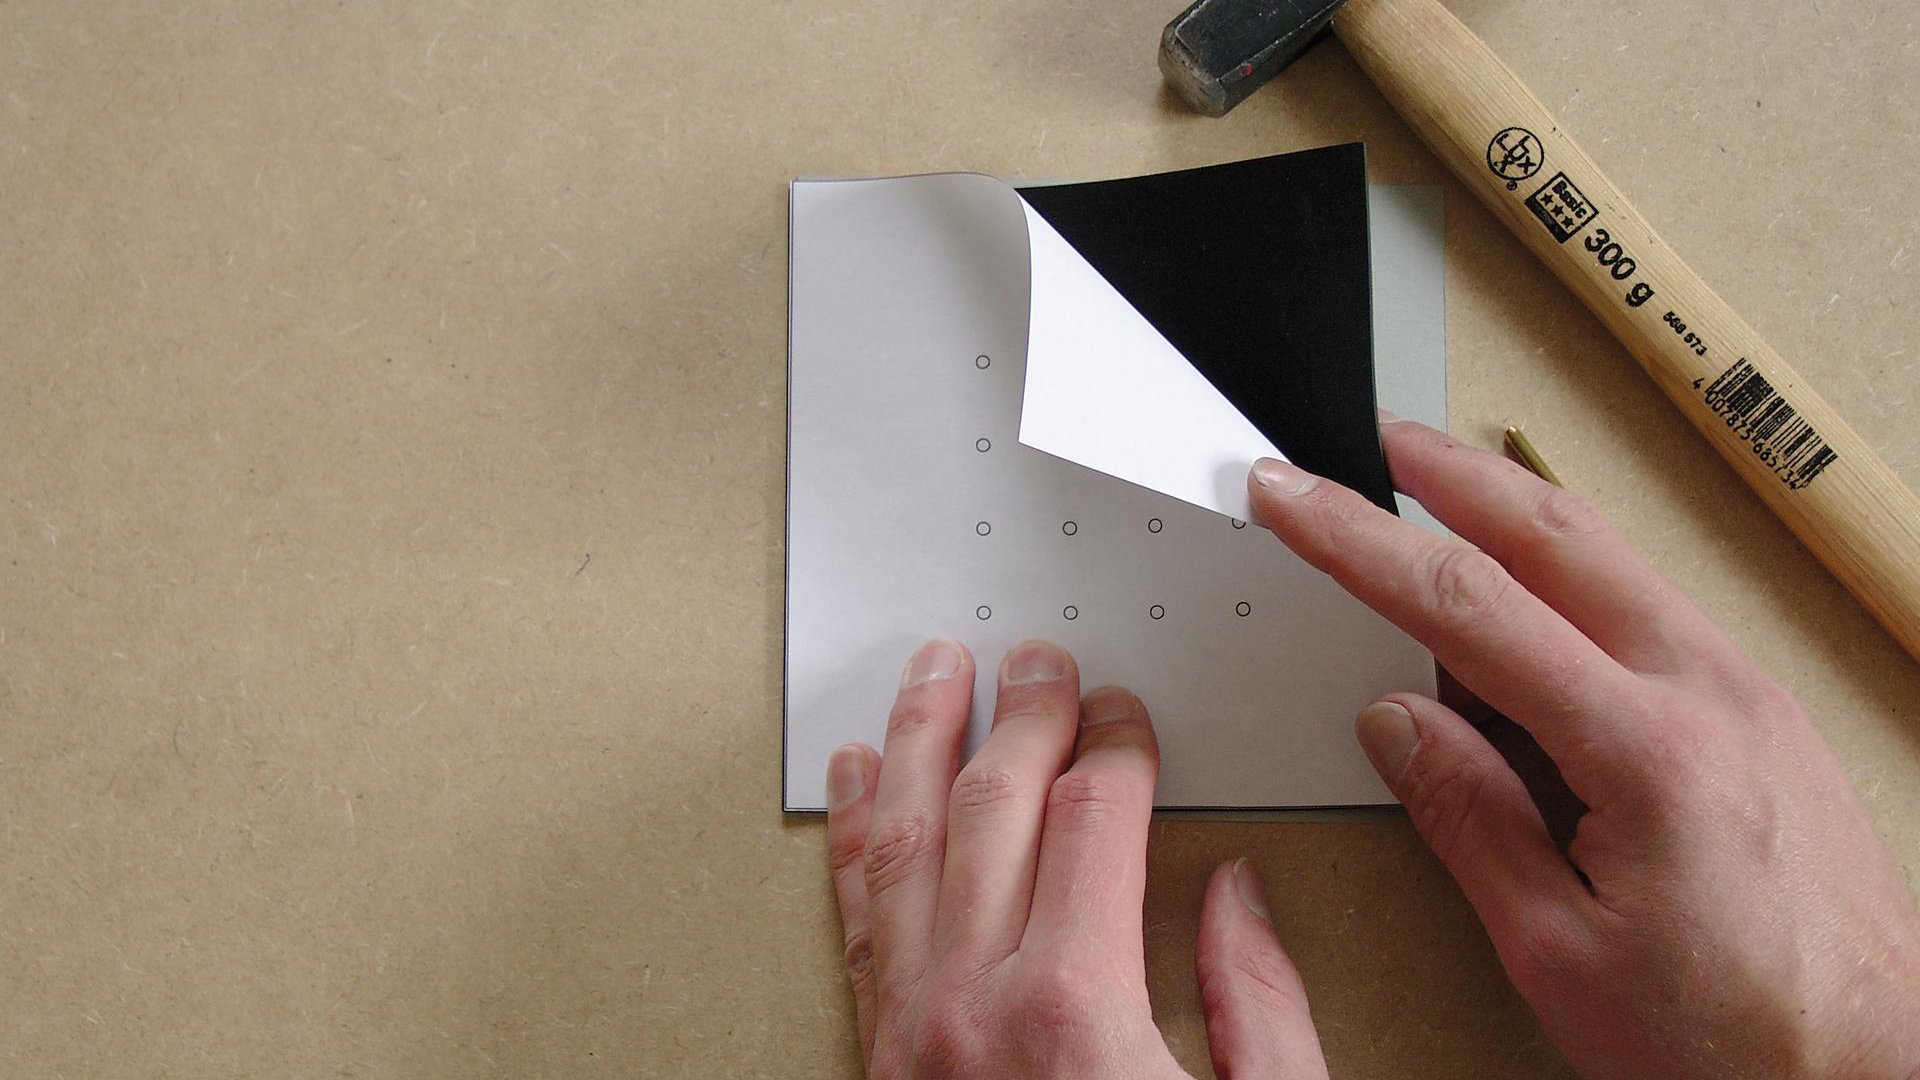
1. Align the underlay, EPDM and punchhole template
Place the EPDM grommet on a cardboard underlay, place the template for punchholes on top of it, and adjust the template to the correct position.
1. Align the underlay, EPDM and punchhole template
Place the EPDM grommet on a cardboard underlay, place the template for punchholes on top of it, and adjust the template to the correct position.
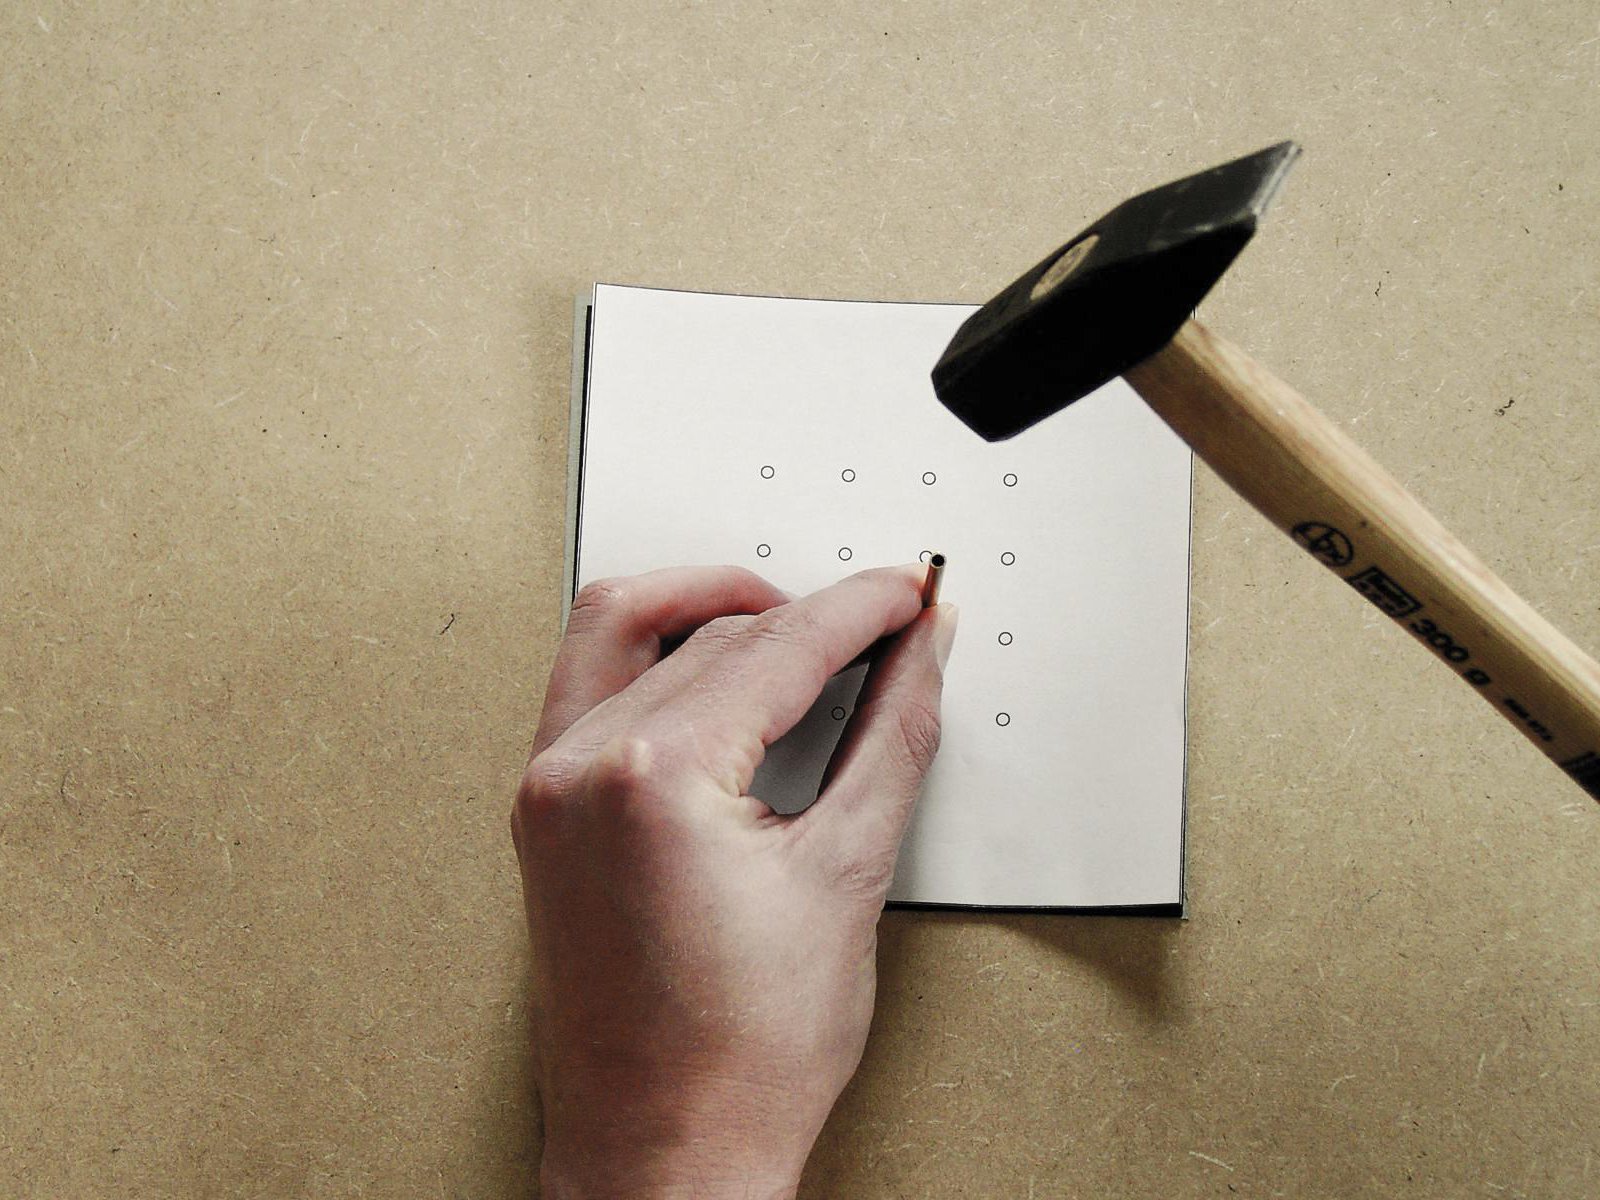
2. Punch out holes
Punch out the required number of holes using the brass tube and hammer that are supplied.
Please note: Punching must be carried out on a subsurface that does not need to be protected against damage. The cardboard base does not provide sufficient protection for surfaces that are easily damaged.
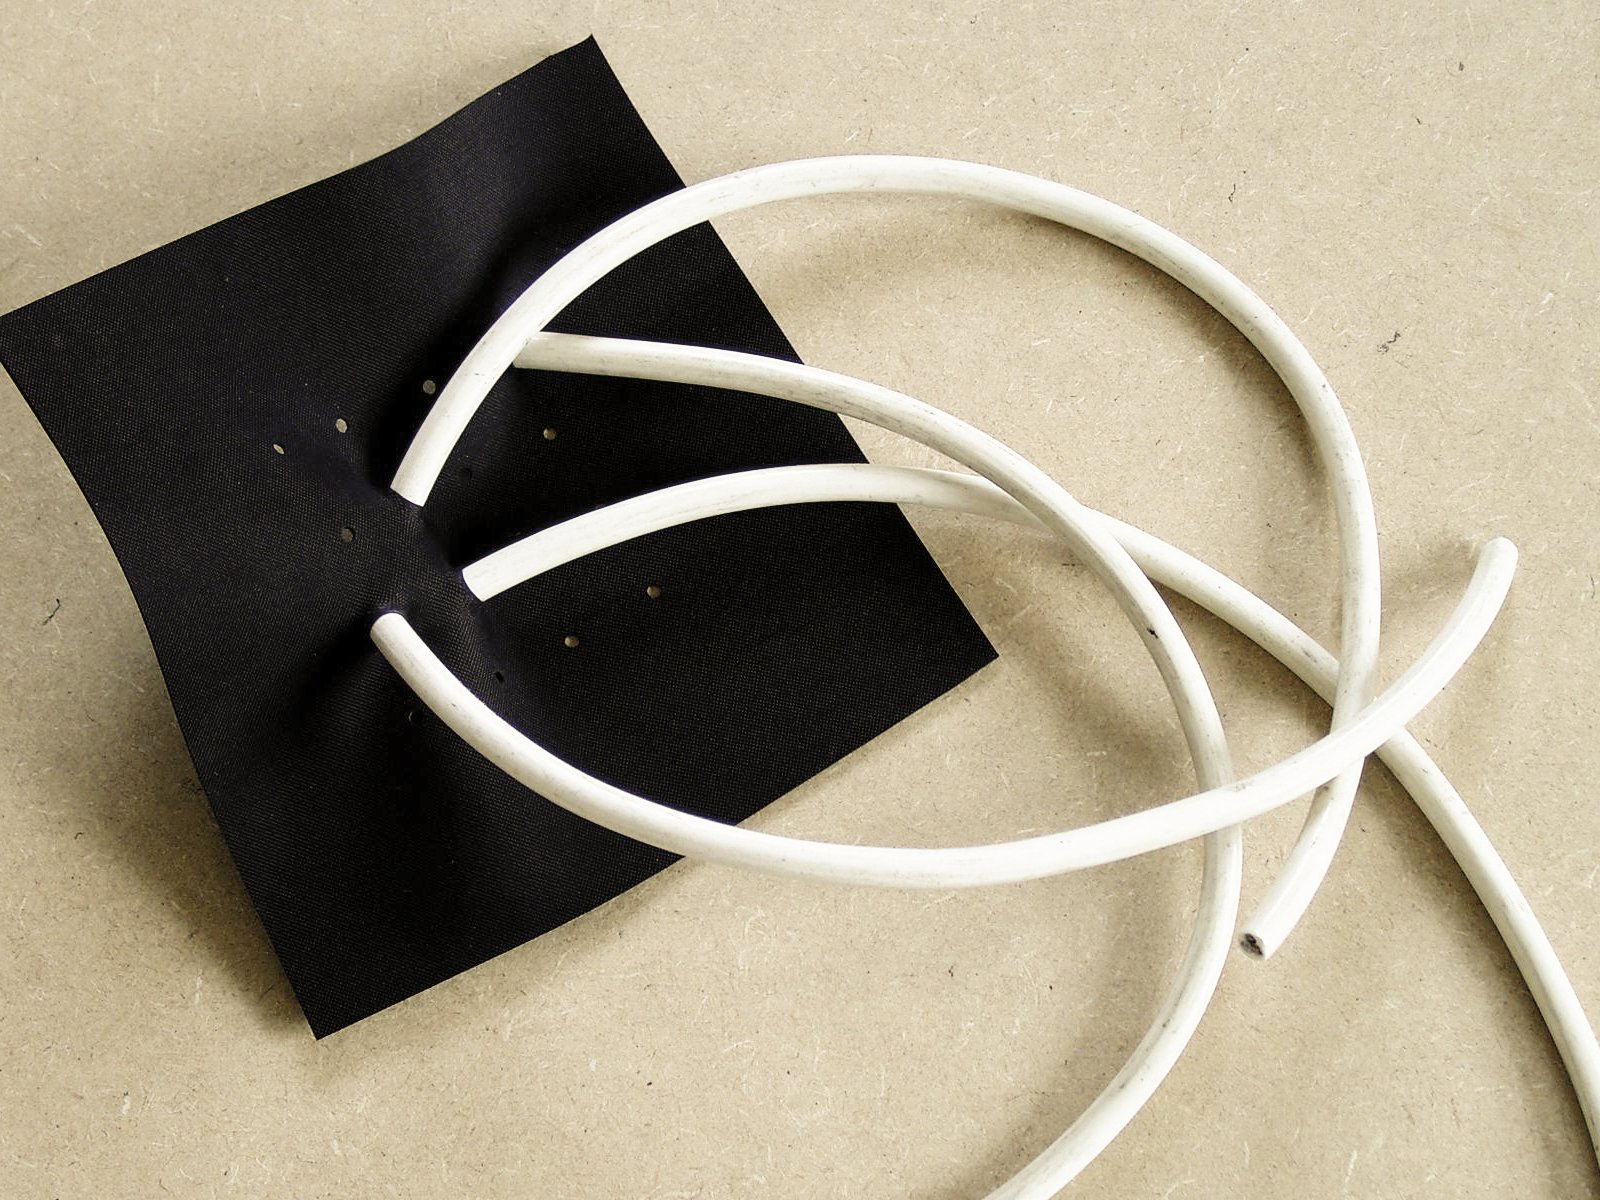
3. Pull cables through
Pull cables with diameters of 4.8 - 12 mm (3/16”-1/2”) through the holes that have been created in the EPDM grommet.
3. Pull cables through
Pull cables with diameters of 4.8 - 12 mm (3/16”-1/2”) through the holes that have been created in the EPDM grommet.
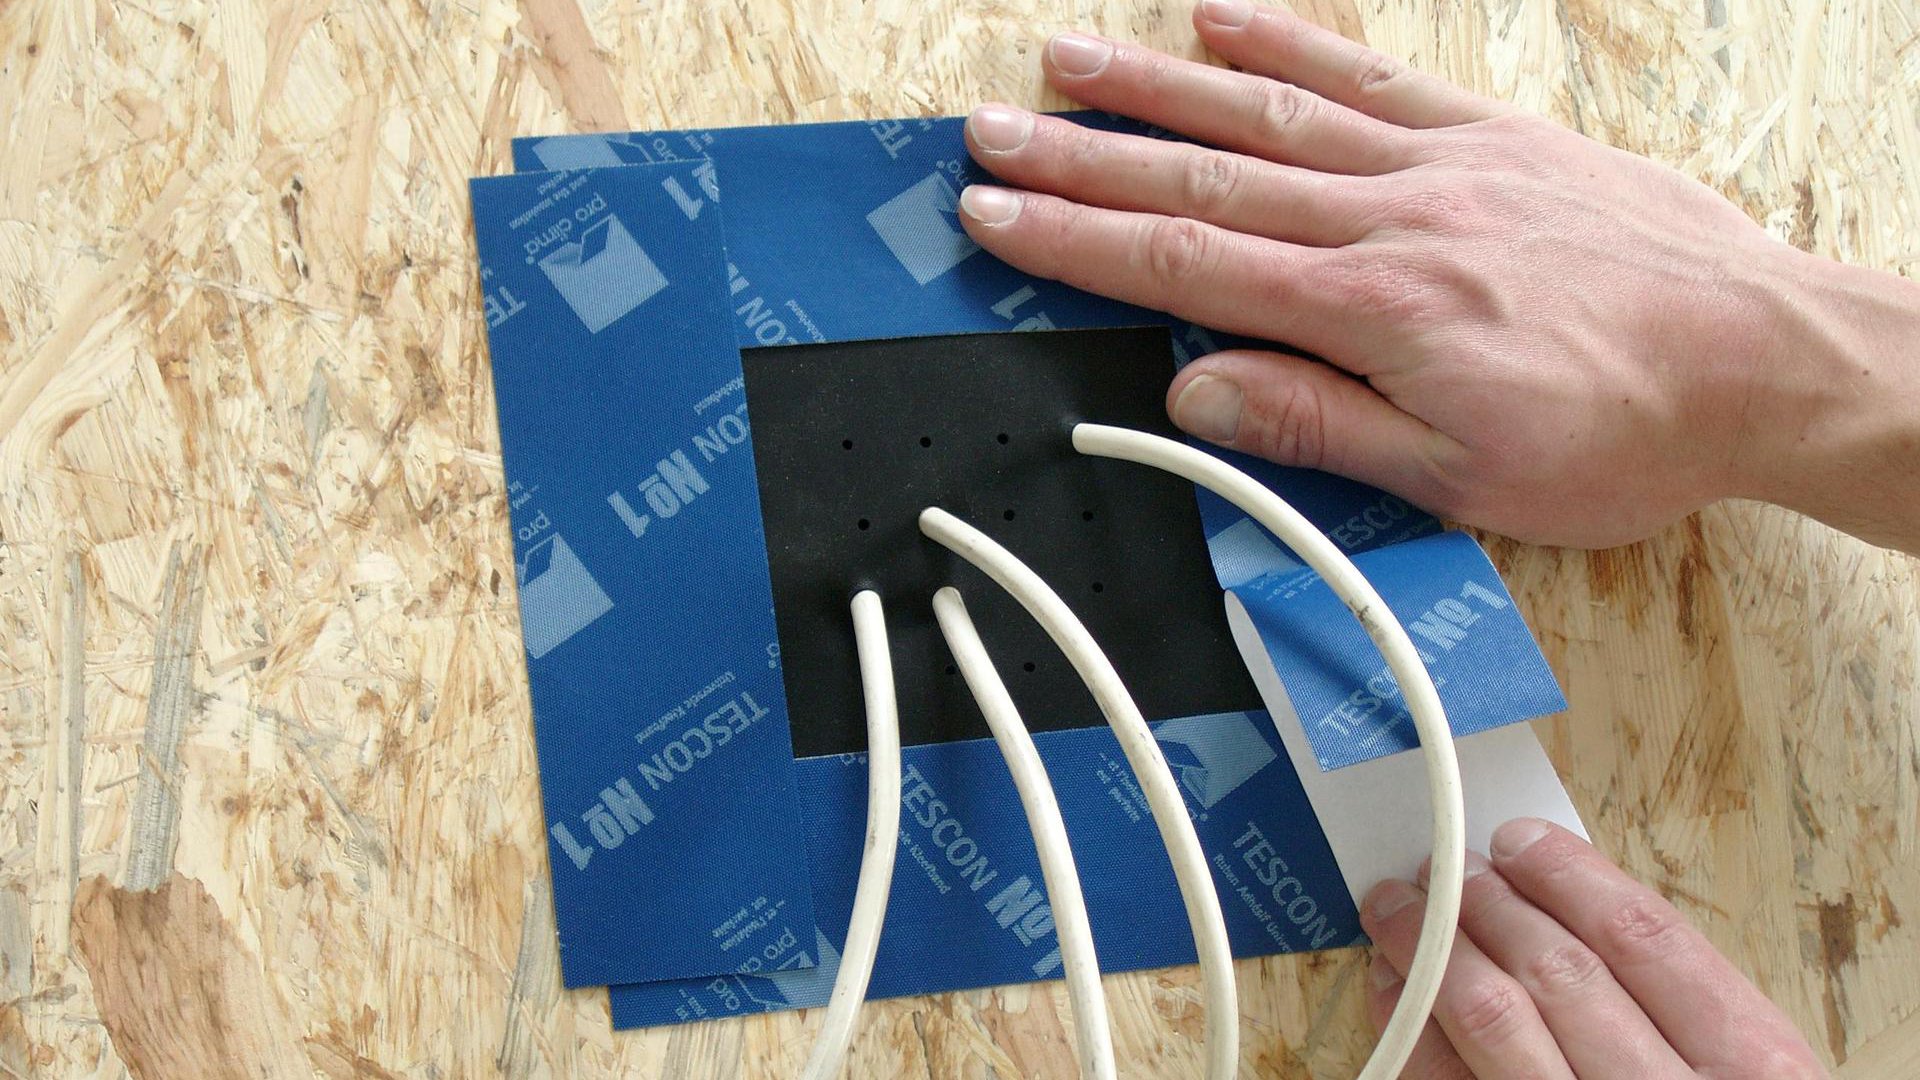
4. Stick the grommet
Press the grommet into place so that it rests flat on the subsurface to be sealed, clean the subsurface and then stick using TESCON VANA (or TESCON INVIS). Rub the tape firmly to secure the adhesive bond.
You’re finished!
Use of the ‘ROFLEX 20 multi’ grommet for multiple conduits is recommended if a number of conduits are to be reliably integrated into the airtightness layer.